Week 24: Abstract Butterfly Wings
It’s like revisiting elementary-school art this week, Friends! We’re squishing paint this 24th week of the 52-Week Art Journal Journey. And I’ll just say that although I’m putting all my funky butterflies out there for the world to see in this week’s prompt video, they won’t necessarily all make it into Instagram art-process reels. Just sayin’.
As always, focus on finding flow in the process, not the subjective “good” of the product.
What you’ll need for this week’s small art…
- something to protect your art surface… newsprint is ideal
- your art journal, of course, open to two blank pages
- acrylic paint
- time to set aside step 1 to dry
- a marker… metallic if you have them (I used a silver Sharpie)
- maybe some spare paper… to enjoy more squishing
- if you choose to experiment with method 2 you’ll also need scissors, a glue stick, and an old credit-card style plastic card
- most importantly, and as always, you’ll need the desire to relax and have some fun with creative-self-care art
It’s another fun relaxing piece of art this week… plus a way to take it a step further… and have even more fun. We’re… hmm… let’s call it blobbing… abstract butterfly wings.
Scroll to the end if you’d like to watch the video first… Don’t forget to like and subscribe! And I always love comments.
Step 1
First protect your art-making surface. Newsprint will give you fun leftover collage paper in method 2.
Pick your colors. There will probably be just a little bit of blending, so keep that in mind, but it’s not a big deal.
Pour (cautiously), dribble, drop, drip paint on one page of your art journal. Keep the shape of butterfly wings in mind, at least vaguely. In this week’s video you get to see what happens when you add a bit too much paint, and a bit too little…
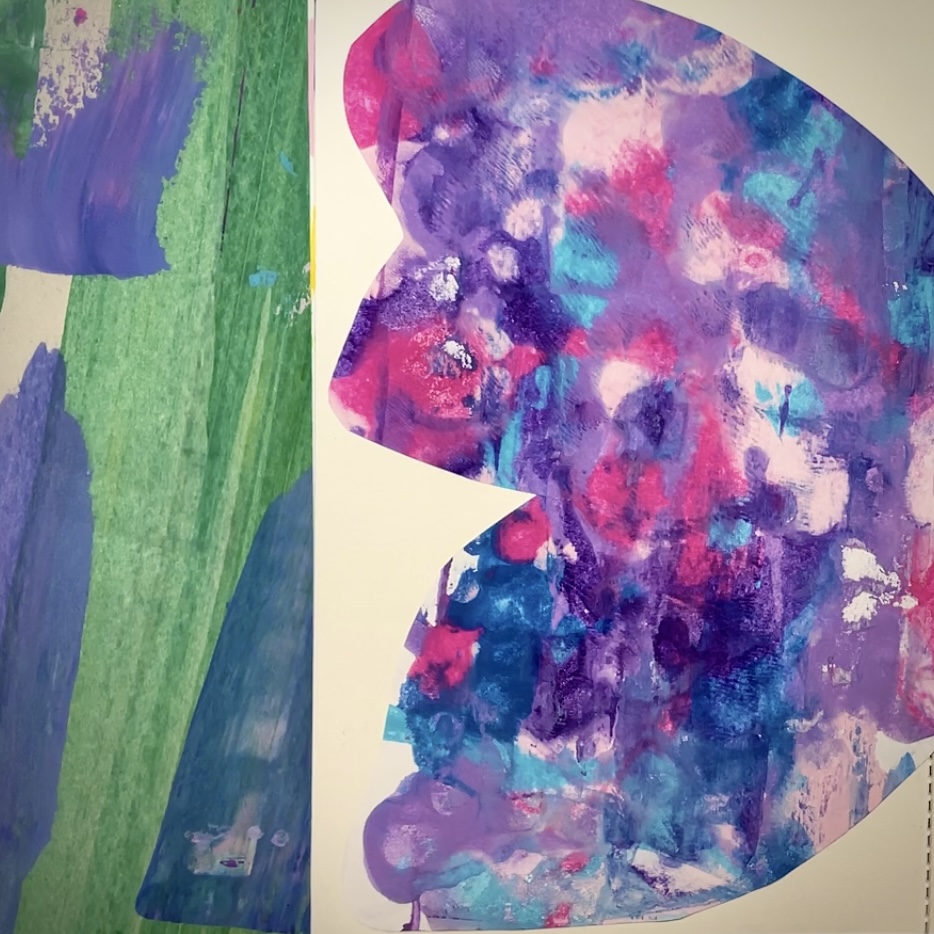
After you have some puddly blobs or blobby puddles of paint on your page, turn the other page onto it.
And squish.
Make sure to squish all parts of your top page against the painted page. You’ll have to rub the back well. If you have too much paint a little close to the edge, it will squeeze out the edges.
If your corner aren’t quite lined up slide your top page until the corners and edges are all lined up… at least relatively well.
After your pages have been fully squished together, open the pages back up.
These butterfly wings will take some drying time before you can do the next step of outlining and decorating.
Take time to squish some more on loose paper if you’d like.
Step 2
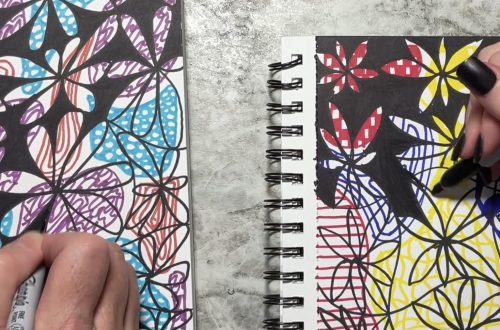
When your butterfly wings are fully dry, use a marker to outline and create designs. This can be relaxing like our Week 13: Relax prompt… by far my most popular YouTube video. I used a silver Sharpie. Not to its greatest advantage… but it’s fun and relaxing if one doesn’t stress too much about how it looks.
If you use a smaller-tipped marker, you can outline things more finely and have more of an opportunity to get lost in the relaxing flow we found in Week 13.
Play with it. It’s all about process over product.
It’s a fun process. And relaxing.
Change
Butterflies. They don’t start their lives with beautiful wings. And metamorphosis isn’t a simple, pretty process for the insect. Though if you’ve ever seen a monarch chrysalis, the messiest part of the process is rather pretty from the outside. But inside, what was a caterpillar and will be a butterfly turns to a soupy gloppy mess. A bit like our paint globs, I suppose, but way grosser, as the the caterpillar’s body is basically digested all the way through in a way similar to how it digested all that food it ate to grow from teeny-tiny to full size.
Although it’s not as dramatic as what happens to the body of a caterpillar to allow it to transform into a butterfly, change can be hard. Even good change is stressful. And growth can be painful.
Let’s take some time to write about change.
Maybe you need to process some of the hard. Which can also make it easier to see the resulting good growth you may struggle to perceive.
Whatever you’ve been through, you’ve made it this far. Let’s keep moving forward. Even when it’s hard. Even when it hurts.
A twist
Here’s another way to make a fun abstract butterfly in your art journal.
You’ll need a separate sheet of paper (I used a simple sheet of printer paper), an old plastic card like a credit card (mine in the video is an old Subway card), scissors, and a glue stick.
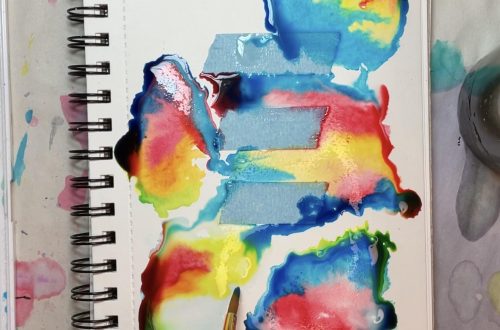
Fold your paper in half to start, and open it back up. Have fun randomly applying paint to one side. And, yes, fold the unpainted side back on top of the painted. Squish and rub them together well, like we did our journal pages, then open your sheet back up after the paint is thoroughly mooshed on both halves.
And here’s where things get different.
Take your card and, starting at the top of one edge, gently but firmly scrape the excess paint down and off the page.
This is where newsprint is ideal: run your card across or down your surface-protecting paper to leave a smear of paint that’s an echo of that on your paper.
Take your cleaned card, and run it back down your squished-paint sheet next to the cleared strip you just created.
Again clean your card in that fun way that leaves you with paper you can keep to collage with.
Repeat the process until you have smoothed the excess paint off your entire page.
This creates a different look. And takes way less time to dry. If you have time, I encourage you to experiment with both methods.
When your page is dry, make it into butterfly wings. The easiest way is to refold your paper down the middle (painted side in), and draw half a butterfly to follow the lines to cut. Then glue your wings onto journal pages.
Until next time
I hope you enjoy this week’s small art, and take some time to journal about change. Writing is a valuable tool in processing and clarifying our experiences and emotions.
Thank you for joining me for another 52-Week Art Journal Journey prompt. I appreciate the opportunity to encourage you to establish a healthy habit of creative self-care through art journaling. If you’d like to receive an extra bit of creative self-care encouragement in your inbox each week, sign up here. Follow this and other parts of my arty journey on Instagram for more inspiration.
If you’re new and wondering what this journey is all about, check out this video introduction. Whether you choose to start from here, or check our earlier prompts (here’s a combined art/journaling prompt that is one of my favorites, especially when I need to calm down a overbusy brain), I encourage you to visit Week 1, where we made our journals, and this journey, our own.
If you choose to share any of your 52-Week Art Journal Journey small art on social media to encourage others to reclaim their creativity, tag me, @melindavanry. I’d love to see it! If you’d like a safe place to share your art play, I have a new private Facebook group for subscribers!
I’ll be back next week with another prompt!


You May Also Like
Week 26: Halfway There!
Week 36: Finding Rest in Creative Self-Care